Prerequisites
- Configure and expose a Lightning App Page with the QBO Query Component. (Version 1.46 comes with this and it is called Accord Super Admin).
- Configure the Status Based Retry Flow on the Accord Record Status Object.
Step 1: Query IDs from the Target QuickBooks Object
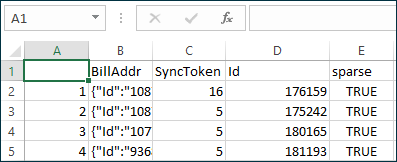
From the QBO Query component, select the IDs and Sync Tokens of all the records that need to be synced.
Example: Select Id, SyncToken From Invoice Where TxnDate < '2021-01-01' And TxnDate >= '2020-01-01'
NOTE
For very large datasets, it may be necessary to execute multiple queries to select all records.

Click Copy All Results to Clipboard.

Step 2: Prepare Accord Record Status Import File
Accord uses the Record Status table to maintain a list of everything that exists in QuickBooks, its current sync status, and associated Salesforce Record.
Add 3 fields to your XLS spreadsheet.

| Column | Description | Example |
| Type | The QBO Entity | Invoice |
| QBO Entity Id | The concatenation of {QB Company Id}-{Type}-{Entity Id} | 123456789-Invoice-176159 |
| Status | The value configured in your Status Based Retry flow | QBO Retry |
Step 3: Load a Test Record
You will want to load a single record to confirm the flow works.
It’s recommended that you perform an UPSERT on appclipse__QB_Id__c. You will only need to map 3 fields.
You should see the record sync in the Accord Monitor Utility:

Note
Depending on your company settings it may be necessary to CLEAR the appclipse__Sync_Token__c field on the Accord Record Status if the record is previously recorded as In Sync and you want to force the re-sync.
Step 4: Load the Full Data Set
At this point you can import the entire file. It’s recommended to use a Serial load with a low a batch size to avoid hitting QBO’s throttle limit.
Step 5: Monitor, Validate, and Handle Any Errors
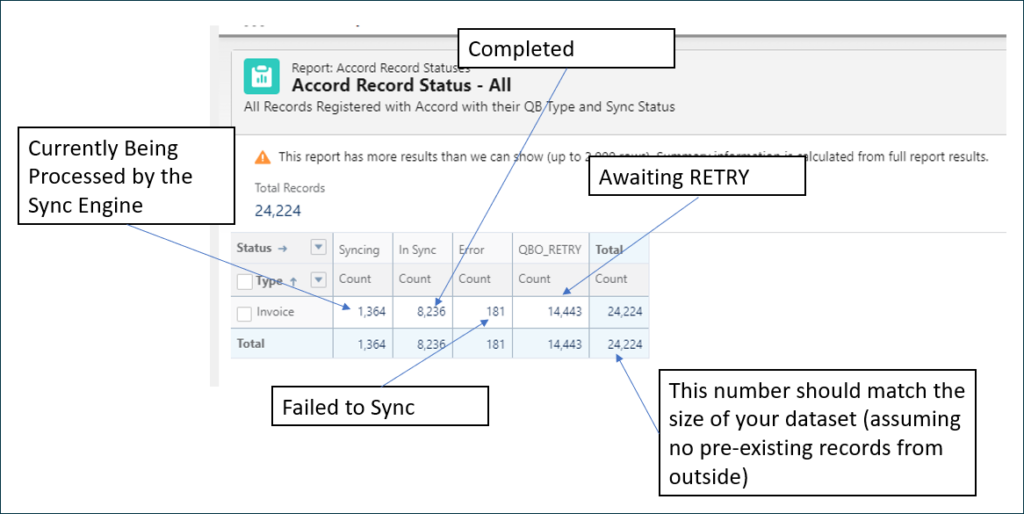
From the Accord Dashboard, you can use the reports to monitor your progress


